
Tongue Drum Project
Some time ago, after my son’s weekly drum lesson on Saturday morning while we were waiting for his sister to finish her extended Clarinet lesson, we decided to amble over to the music store across the street. There on display was a “tongue drum”. Hitherto, I’d never seen or heard of such a thing. I don’t remember what they were asking for it, but it looked like something I might be able to make.
So, last week I let my fingers loose on Bing and Google and was able to find some free plans. I wandered over to my favorite hardwood store and bought some lumber. But, even before doing so, I realized that I was missing one essential tool – a decent scroll saw. (Note the qualification – yes, I did already have a scroll saw, but it was junk – not at all suitable for my needs on this project.)
As you can probably tell where this is going, this project afforded me the opportunity to rectify a deficit in my tool collection. Trusty Craig’s List showed me an old cast iron craftsman 22″ scroll saw for the meager price of $50. Voila, problem (ok, so maybe “problem” isn’t quite the right word) solved. So, on the Friday after Thanksgiving, when everyone else was out fighting the crowds, I bought the saw from a very nice lady who lives not far from my house, and went directly to the aforementioned lumber store immediately thereafter.
I bought some Maple and some Padauk, then went home to unload my prizes. I started by showing my wife my new saw – somehow she didn’t seem as enthusiastic as I was. I suppose I might be mistaken, but I’m pretty sure she wasn’t as impressed with my prudent and frugal purchase of this saw over a much more expensive Hawk or Dewalt saw as she might (should?) have been. Anyway, I digress. I promptly disassembled the saw and greased the bearings. I also replaced a couple of missing nuts and bolts and was pleased with how smoothly it operated subsequently.
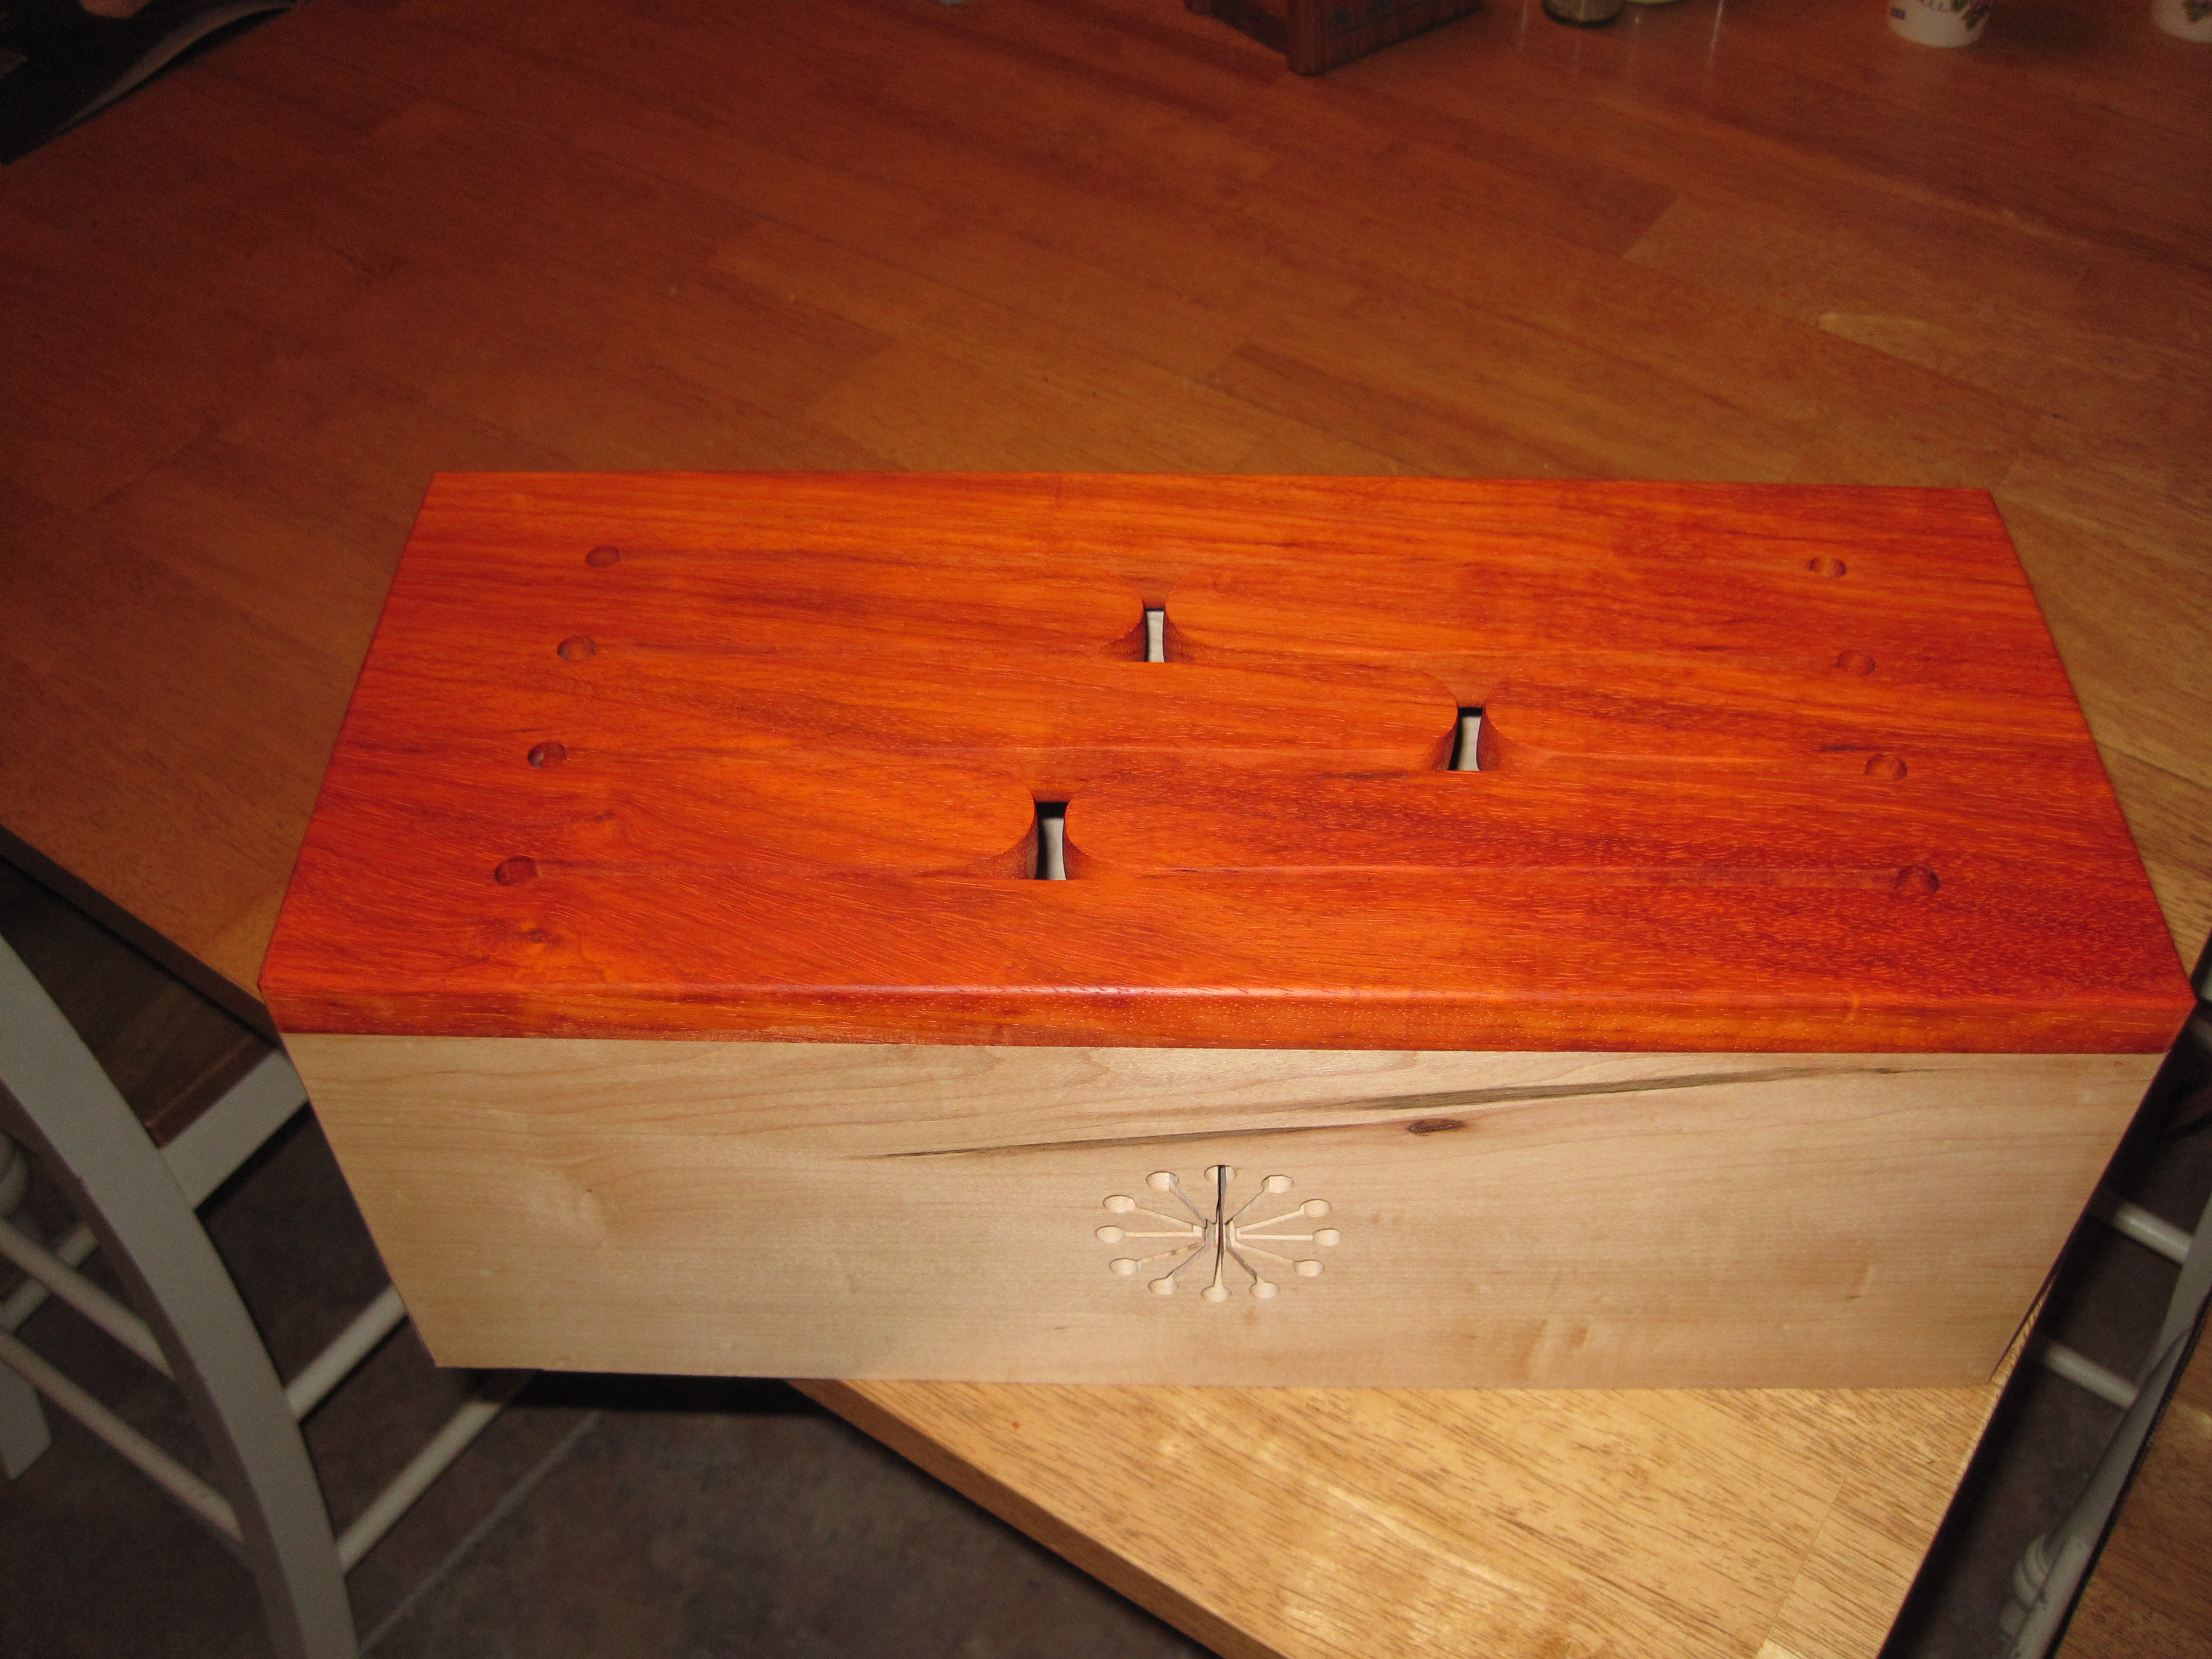
Another great thing about this project (other than as justification, uh I mean being veritably forced to buy an essential tool), was the opportunity to try my hand at several new woodworking skills. Because of the horrendous quality of my previous scroll saw (unusable really) I had never done much work with one of these tools. I got to cut out the slots in the top of the drum and the sound hole design with my latest acquisition. The saw worked great! (Although, clearly I would benefit from some practice.)
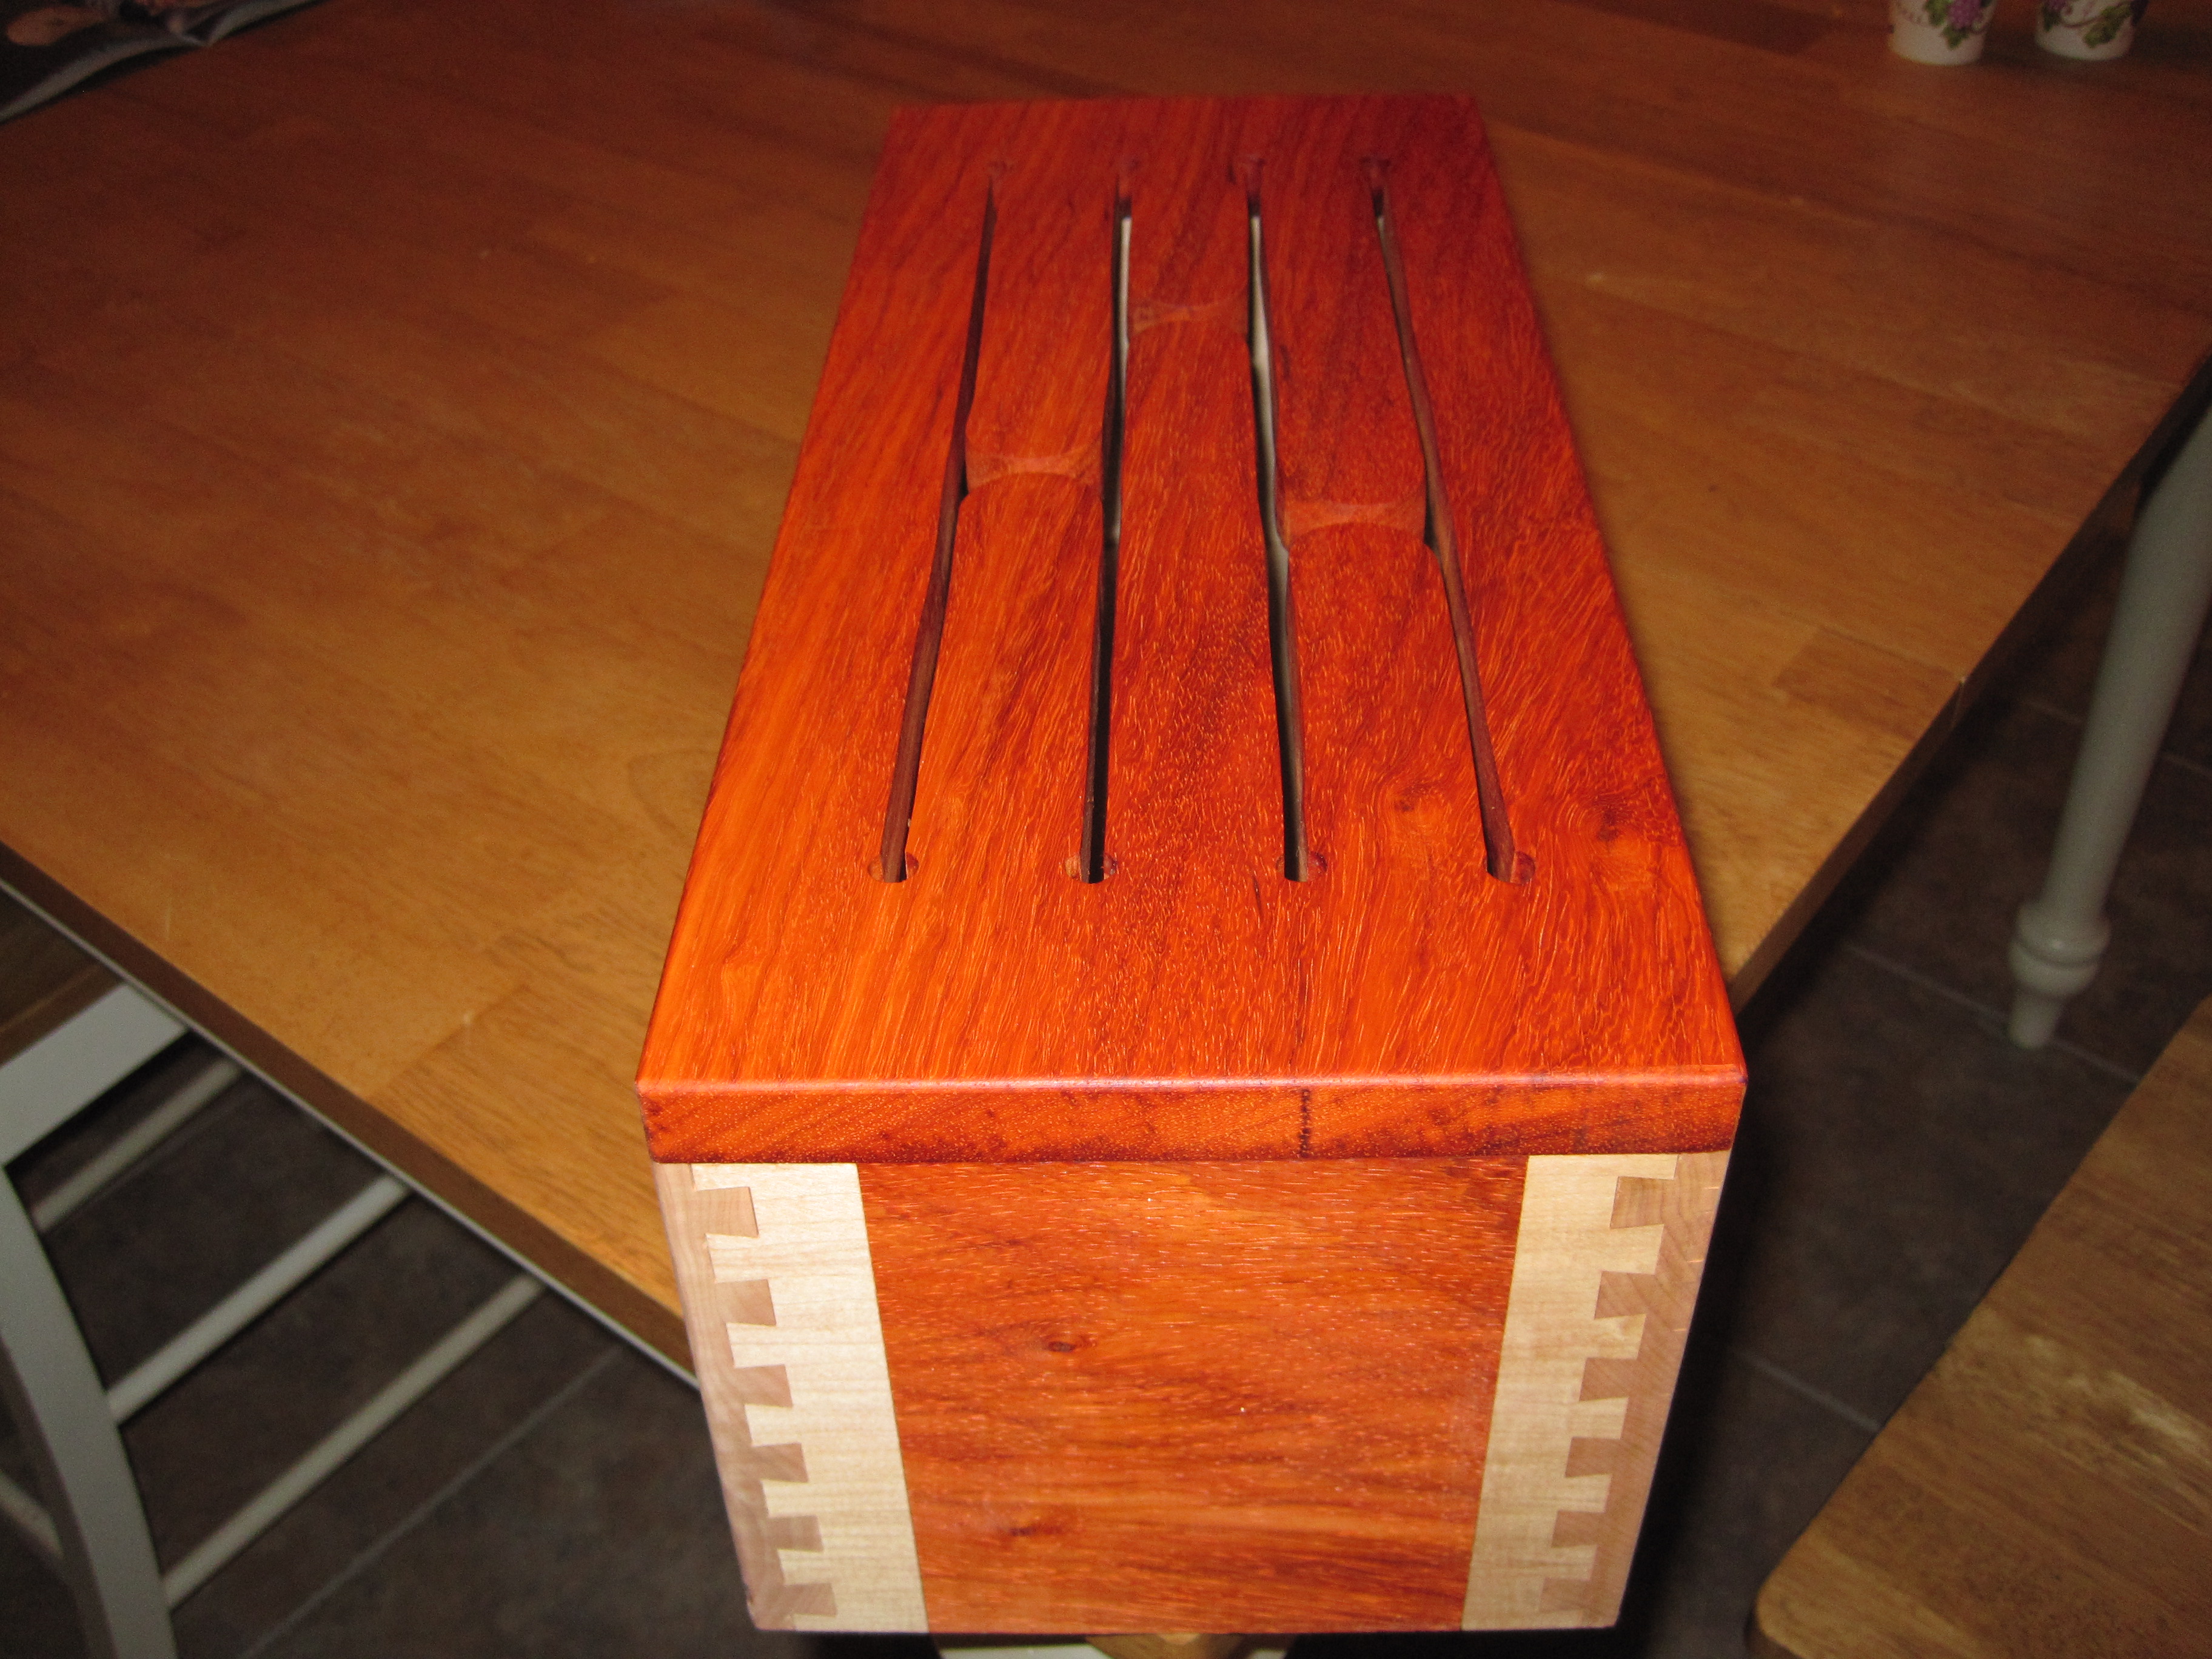
But wait, there’s more! I also got to practice with my Porter Cable dovetail jig. It was here I made my first big mistake on the project. If you don’t double-check yourself it’s real easy to get the pieces on a project mixed up. I ended up cutting tails where there should have been pins and pins where there should have been tails on two boards. Duh! And, “woodn’t” (pun intended) you know, I didn’t have any extra Maple.
So, the following Saturday I took my son and daughter to their lessons and then bopped over to Timber for another piece of wood while they were busy learning the finer points of drum and clarinet playing. I retrieved my children a few minutes late, but they agreed that I had made a good choice to go while they were in their lessons, rather than to allow them the special treat of going to the wood store. They just never seem as excited about that as I am. I don’t understand it, really, but … Anyway, back to the matter at hand.
It was a trade off – going to Timber was closer and could be done while the kids were in their lessons, but the lumber from Timber is rough cut at 4/4 stock. The stuff I got from Woodworker’s Source was planed to 3/4. So, this meant I had to dimension the new plank accordingly on the thickness planer. Fortunately, I have one of these essential tools. Once this was done, I ran the plank through the jointer and then cut the new piece out. I ended up shortening the length of the drum by about 1/2″ so as to salvage the other piece. I took special care when cutting new tails and pins.
At this point I created a rabbet along the bottom edge of all 4 sides and all the way around a piece of Baltic Birch plywood for the bottom. Once this was done, I could dry assemble the box and tap on the top to see what kind of sound I was getting. I was also out of weekend.
On this past weekend, I decided to finish the project. I thought I would try to use a new router inlay template system. So, first I did some resawing with my big bandsaw and did some practicing on some scrap. I finally got a decent cut-out and pocket cut out, but it wasn’t as easy as it looked. What I (thought) I learned was that you want the cut-outs to be thin and the pockets to be shallow. I cut out a couple of bow-tie shaped pieces of Padauk and thought I was ready to cut out a matching pocket on the side of the drum. It didn’t work out at all! Darn, now I’d screwed it all up. Or did I? I didn’t want to have to start completely over, so, like Winnie the Pooh under the honey tree, I thought and thought and thought and thought …
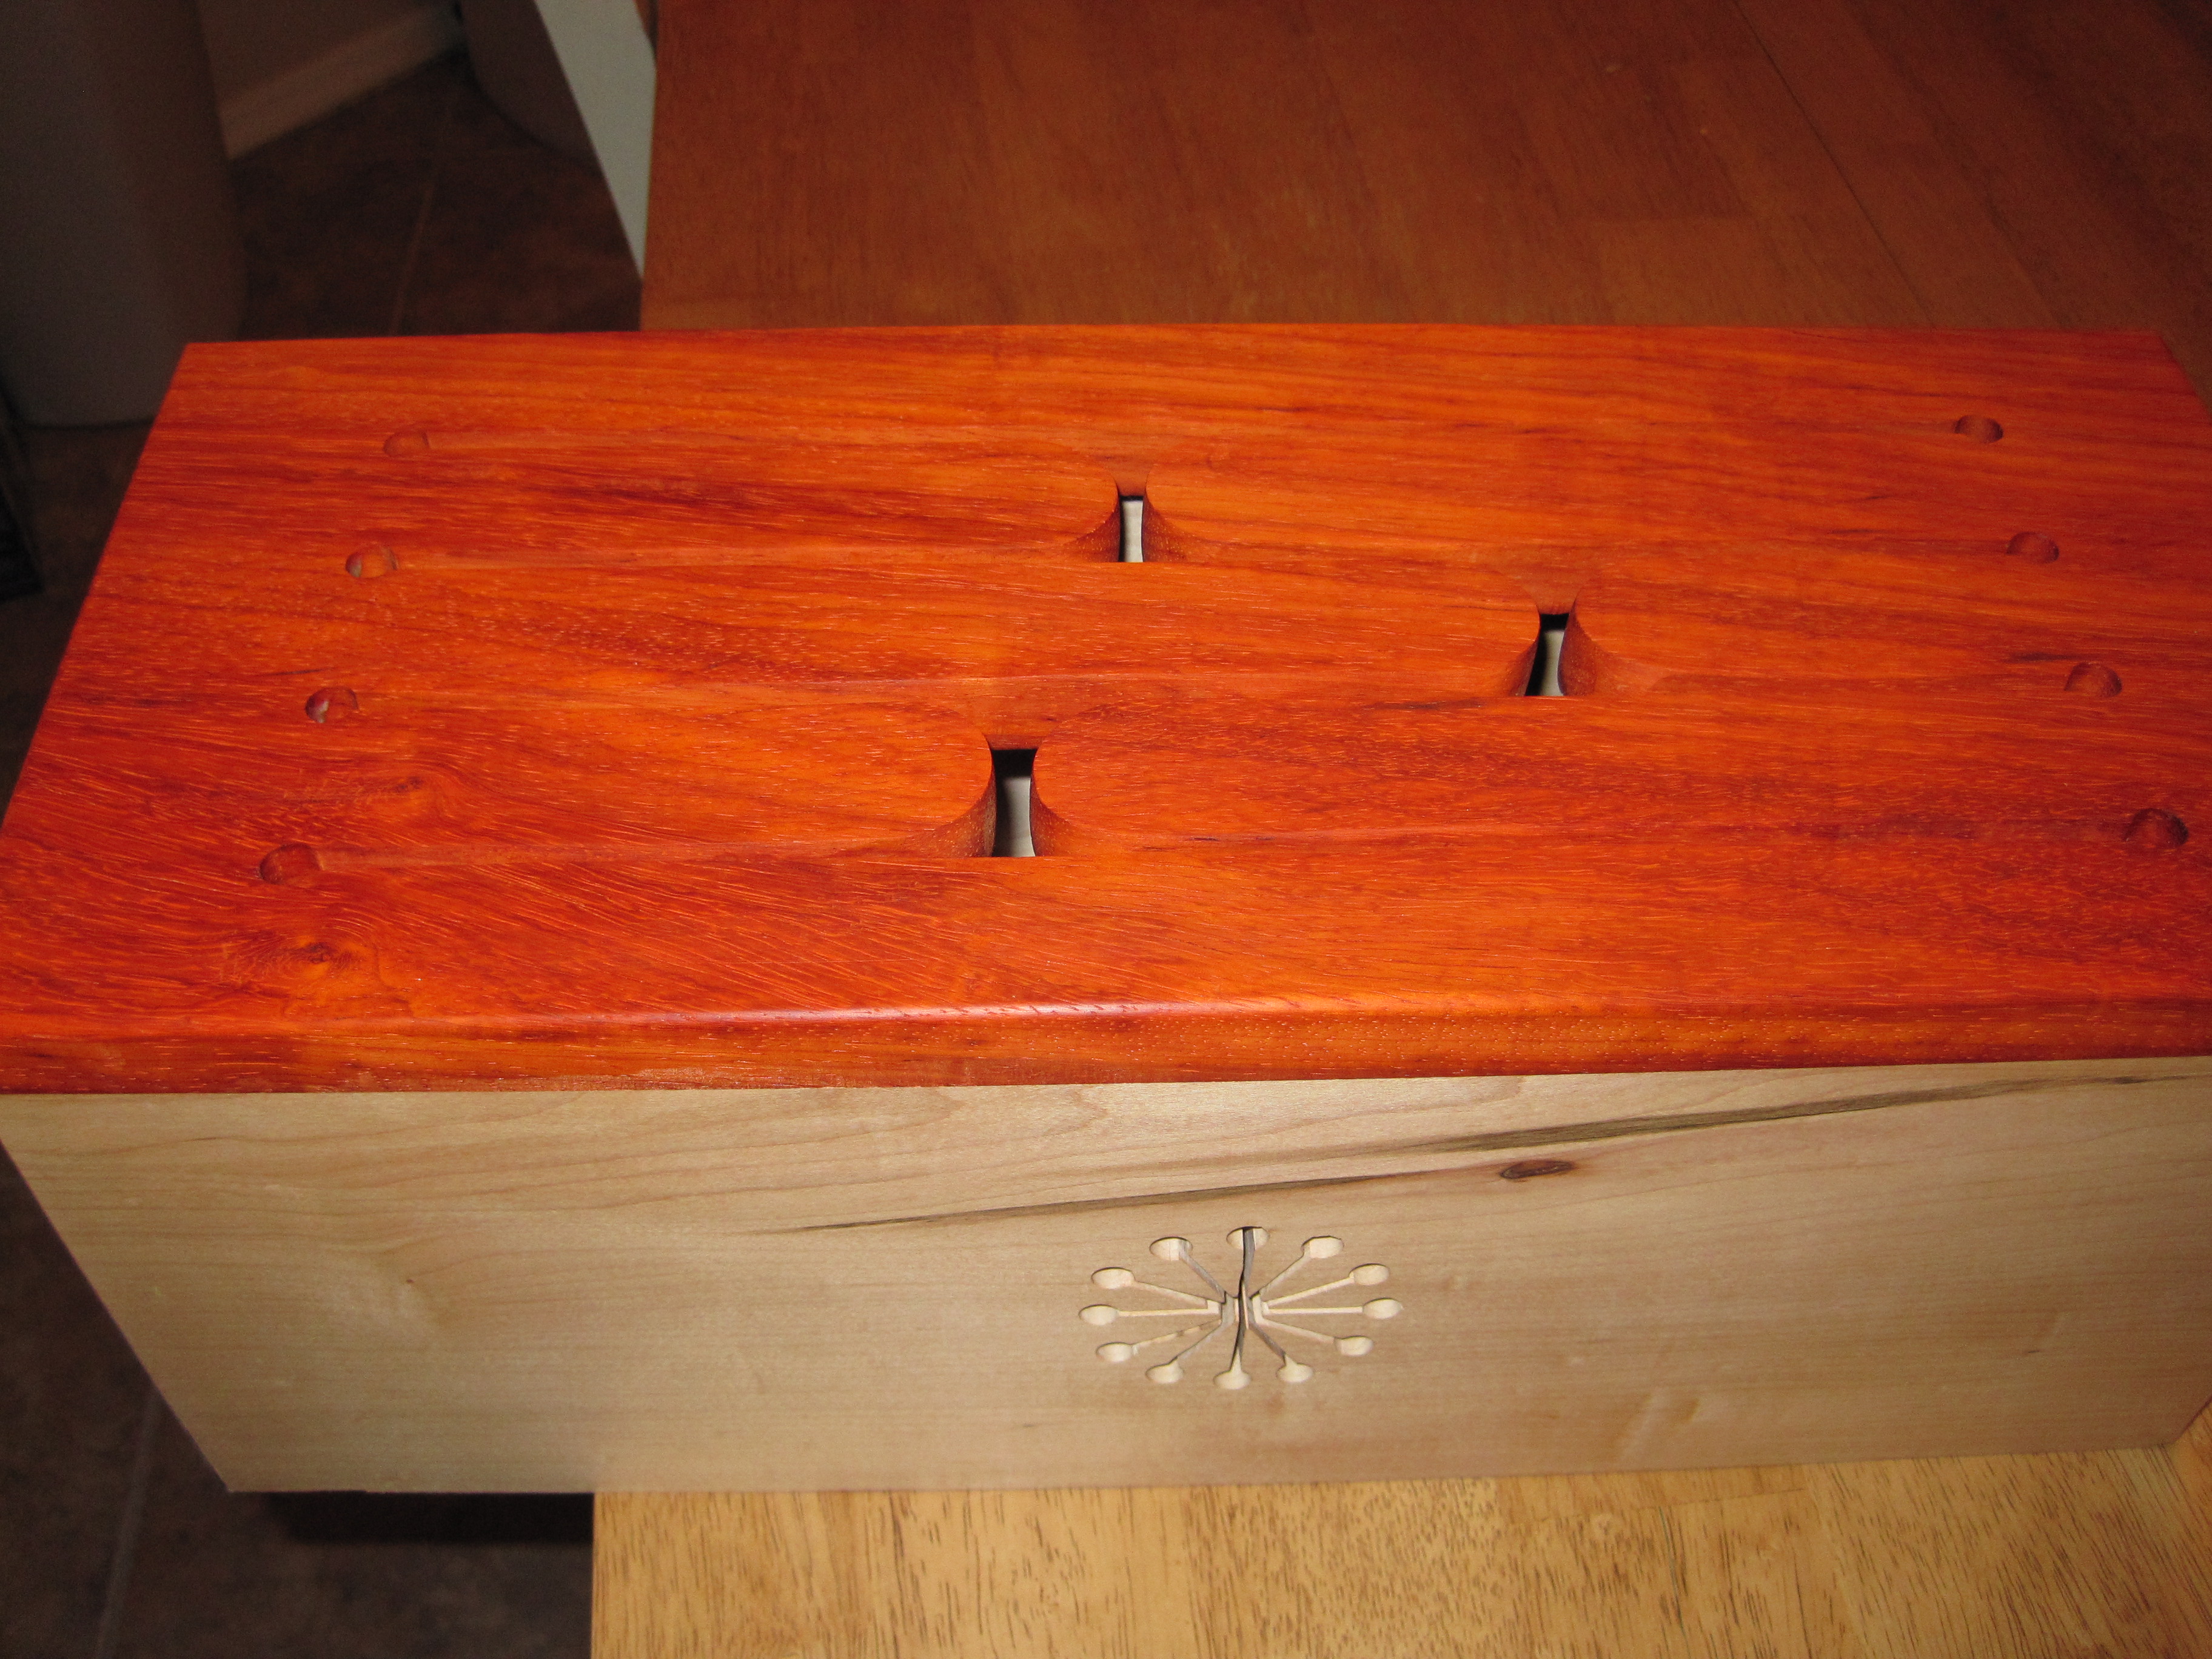
I put aside the inlay stuff for another time. Instead of inlaying a bow-tie piece I cut out a square pocket in each side piece and then resawed a couple thin pieces of Padauk. I carefully cut them to the right width and height and glued them in place. It looks intentional because it’s the same on both sides and nicely covers up my goofs with the router. The ends are book-matched because they come out of the same board!
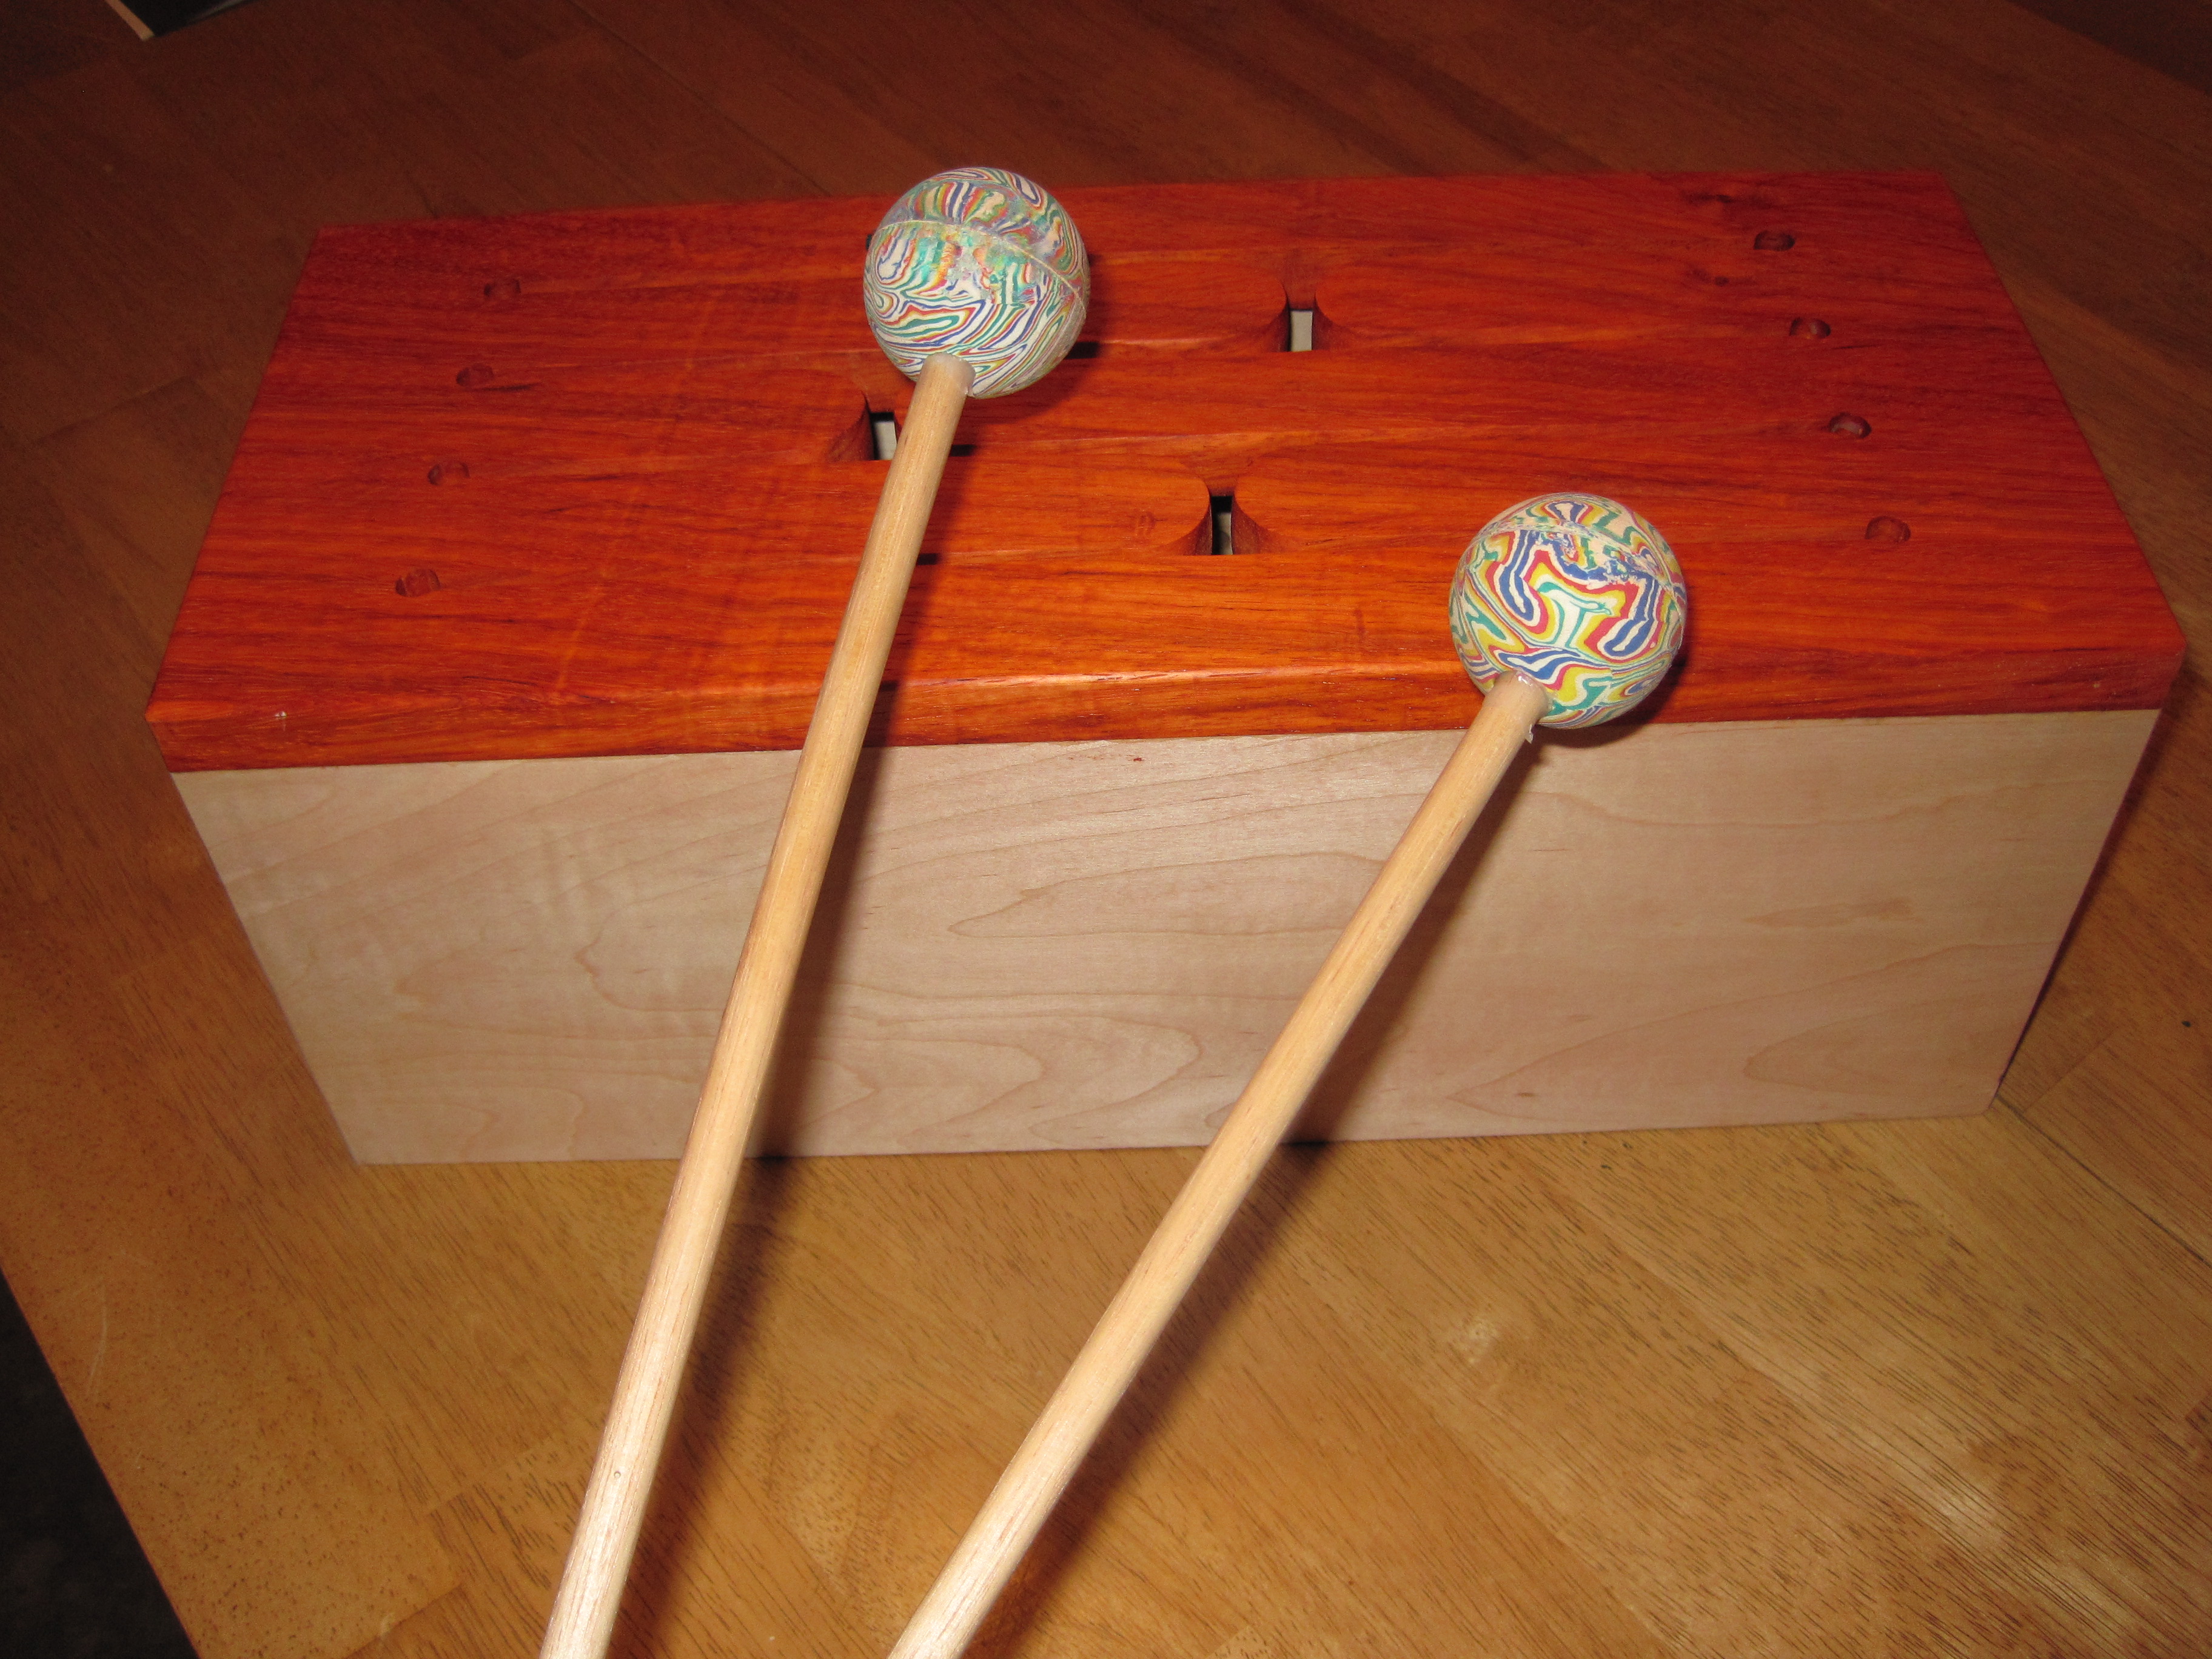
Mistakes dealt with, it was time to glue it up. I glued everything but the top. I’d need to be able to take that on and off for “tuning”. My son volunteered a couple of matching bouncy balls which I used to make some mallets for the drum. I drilled out 3/8″ hole and glued in some dowels of the same diameter. That gave me something to strike the drum with other than my fingers.
Tuning the drum is probably not too accurate, since I didn’t actually “tune” it per se. What I was mostly interested in was making sure the tongues actually did vibrate and make sound. To effect sound quality I simply put a 3/8″ bit in the drill press and set the depth to about 1/4″. I then drilled a series of shallow holes on the back side of the tongues near to their roots. I used a chisel to selectively remove more or less material around the holes. I’d then clamp the top back on the box and test. Once I was satisfied with the result I began sanding.
Sanding between the tongues and rounding out my imperfect scroll work on the ends of the tongues ended up being a bit arduous, but not terrible. I took an old sanding belt and tore it into pieces. I could then insert this in the slots and slide it back and forth around the curved ends towel-fashion. (Picture standing in your bath drying your backside with a towel, pulling first one end, then the other. Hey, it’s the most descriptive way I could come up with!) Slots sanded and quasi-tuned, I glued the top in place.
I intentionally made the top slightly larger than the box itself, so once it was dry I used a edge trimming bit on the router to match it up. Then I swapped it for a 1/4″ round over bit and rounded all the edges.
I was amazed at how different (much better) it sounded with the top glued in place than with it clamped. I also realized that I’ll need to put on some little rubber feet. It sounds much better when held or standing on end than when sitting flat. It seems as though the bottom dampens the vibration and thus the sound.
It came out fairly well, considering my meager abilities and the number of mistakes I made along the way. Now, if I only had rhythm!
Sign Up For Post Alerts!
 The posts are coming!
Currently Reading
-

Truman by David McCullough -

Kingdom of Caine by Andrew Klavan -

Complete Stories and Poems by Edgar Allan Poe
6 comments
Man, if I ever tried something like this, they’d soon be calling me “Fingers,” for the fact that I’d no longer have any …
[Reply]
Martin Reply:
April 26th, 2014 at 10:35 am
Thus far, I have retained all my digits. 🙂 I think all it takes is a combination of patience and practice. I’ll never be very good, but it’s about the process as much, if not more than the end result.
[Reply]
That’s cool! Nice work.
[Reply]
Martin Reply:
April 26th, 2014 at 6:02 pm
Thanks Steve. It was fun to make.
[Reply]
That’s very cool! I am immensely impressed with anyone who can build things. I can’t nail two pieces of wood together.
[Reply]
Martin Reply:
April 26th, 2014 at 7:36 pm
Thanks Curtice, just takes a bit of practice.
[Reply]
Leave a Comment