
Headboard No. 3
March 31, 2008
I got out the old Naval Jelly, some steel wool, and a Scotch-Brite pad. After a couple hours of elbow grease the top was back in good shape. I then cleaned it thoroughly with water (dried it immediately) to remove any residue, and then polished it up with some paste wax. I gave a similar treatment to the fence rails and guides which also had some light rusting.
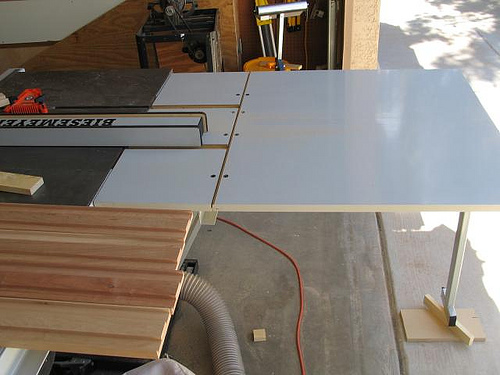
After reinstalling the two cast iron extensions to bring them up to as nearly level with the top of the table as I could get them, I went to work on the side table. Basically, it’s a long platform sandwiched between two steel supports, one of which doubles as a part of the rip fence guide. The previous owner had drilled one hole near the side of the saw, and the other at the end, leaving an unsupported span of about 4 feet in the middle. Now these rails are pre-drilled all along their length at intervals of about 6 inches. For whatever reason, the previous owner had elected not to drill through the would support except for the first and last positions on either side. While it probably looked fine when he first did it, over time, it caused the middle of the table to sag.
Not acceptable.
To fix this, I removed the two bolts farthest from the saw, and then began, through the use of clamps and leverage to drill and bolt outward, to “unwarp” the table top. I ended up adding an additional 10 bolts, and while it’s not totally perfect, as might have been accomplished had it been done initially, it’s much better. The fence system does not show gaps as it slides along its length. There’s a lesson here, don’t be lazy, the extra 15 minutes you save by doing something half way, will have consequences that outweigh that savings.
I spent some time verifying the saw’s accuracy, squareness, stops, etc. All told, I probably put 8 hours in cleaning and adjusting it. I also installed a 25′ 10 gauge power cord with an L6 30Amp 230V plug. (I like the locking plug set up.)
Once it was ship shape, it was time to use it. Much to my wonderful wife’s chagrin, I did not advertise my previous saw as I was reluctant to do so, until I had verified my satisfaction with this one.
On to the headboard.
The headboard has a post on either side that support it and attach to the bed frame. Each post will end up being about 55″ high and about 4″ square. Each are composed of 4 long pieces and some decorative caps. I began work on these pieces by ripping our the face-pieces from my 3/4″ stock. Then I cut them to rough length of 54″. I ended up with a scrap of about 14″ or so that was the same width (4″). I used this piece to perform test cuts to set up the saw for creating the rabbets.
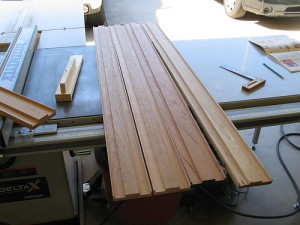
Here are the dado’d pieces after the first pass.
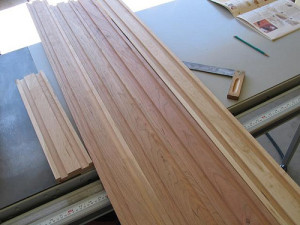
Here they are after the second pass over the dado set.
Note the technique employed here. Basically the boards were rough cut to be a little wider than necessary. Then I cut grooves with a 1/8″ overlap. to support the face of the board throughout the process. Once an approximately 1″ wide groove dadoed into the board, I flipped the board and trimmed off the edges. It was here that the test board proved its worth. I misread the diagram, instead of trimming the edge as shown here, I trimmed the test board with the small edge toward the fence, when I got to the end it wandered off unevenly, and dangerously. I couldn’t believe that the diagram had indicated this, on double checking, it hadn’t! Doh! See below:
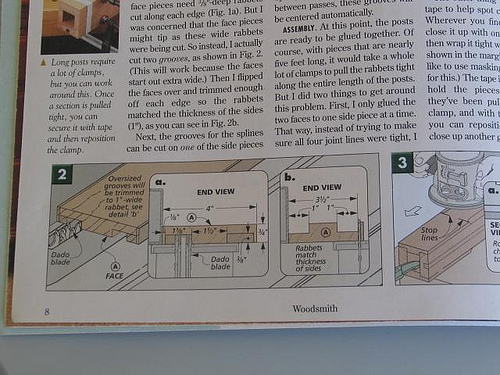
Lesson here, listen to the little voice that says, this doesn’t seem like the right way to do it. Even had the diagram been wrong, I never should have attempted a cut like that. I knew better.
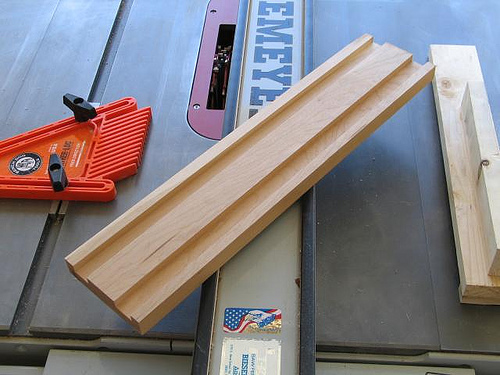
Here are the trimmed pieces:

Throughout this process with the saw, I have really enjoyed the out-feed table on this new saw! It’s SO much nicer than: A.) not having it, or B.) trying to set up roller supports correctly.
Once they were trimmed to form rabbets, I realized that I probably should have made multiple passes over the dado blade. They bottom of the groove wasn’t as clean and smooth as will be required for gluing up the posts. Time to get out the rabbet plane!

After considerable tweaking, testing and adjusting of this plane, I’ve begun work on cleaning up these “pesky wabbets” (nod to Elmer Fudd). Isn’t that plane pretty? I have devoted many hours to cleaning it up and lapping the sole. (And I’m not yet satisfied.)
Sign Up For Post Alerts!
 The posts are coming!
Currently Reading
-

Truman by David McCullough -

Kingdom of Caine by Andrew Klavan -

Complete Stories and Poems by Edgar Allan Poe
0 comments
Kick things off by filling out the form below.
Leave a Comment